Friday, December 16, 2011

DIY: Stain your old table


When moving out of our last apartment J and I asked our roommate D if we could have the table she had if she wasn’t going to take it with her to her new apartment in Boston.  She let us keep it, so we moved it with all of our belongings to my parents’ house.
Thanksgiving two years ago, but you can see how light the table is

Before moving into our current place J decided to do his own DIY project with the table.  Since the table had accumulated nicks and paint from using it in our past apartments, J decided he wanted to sand and stain the table.
Newly sanded, but not stained yet

A friend from J’s work already had stain and lacquer for him to use and he got it okayed to use the sander at work and complete the whole project as well.  He began working on the table and decided partway through to only stain and sand the top and paint the legs and underside of the table black.
Sorry for the poor quality picture.  Early stages of lacquer and stain.
 When he was finished after many coats of stain, lacquer, and paint, we had to wait a week for it to cure and be able to use it.   It was well worth the wait.  The table looks brand new and I’m in love with the color (deep mahogany). 


Doesn’t it look so nice with all the holiday décor now?

DIY: Christmas Decorations

             I apologize for the lack of posts this week; the Holiday’s quick approach has me running around getting last minute things together.  I hope all of you are having a less chaotic week!

            This past weekend was pretty relaxing around here.  J’s parents sent us some of his Christmas ornaments to decorate our tree with since we only had 5 ornaments on our tree.  We listened to holiday music and decorated. 

From J's aunt, reminds me that our trip is not far away!
From my aunt, it says "Our First Home"

Some of my favorites are the ornaments that J's grandmother made
Also, since J’s table is ready for us to use we got some new placements, a poinsettia and used some other Christmas goodies that J’s parents sent.


            MyChristmas yarn wreath is up on our door.  I had to tie it to our doorknocker since there is no hook or nail to use.

            Our last holiday decoration is a DIY project I finished a couple weeks ago.

What you’ll need:

I've filled in this frame previously with pictures from magazine as you can see here.


  •  Old or new Christmas cards, just the front part. (I try to use cards our families send us.  I write who it is from and the year on the back.  I like that it becomes a decoration that is personal to us).
  • Picture frame, preferably one that has a matte already cut for multiple pictures or you can DIY by purchasing matte board and cutting out sections with an exacto knife.
  •  Scissors
  •  Tape


Making this is pretty simple.  Take the backing of the frame off.  Play around with the combinations of cards in the openings.  When you’ve decided which cards you want where, you may feel you need to cut down some of the cards or cut a card into two pieces in order to use it in two different slots.  Tape all the cards back in place, place the backing on and the project is complete!  Hang wherever you feel needs some holiday décor.  I put one in our bathroom to brighten our awful white walls and one in our Living Room area.  


What I love about these is that they aren't permanent, you can change them up every year and you can change it for all seasons/holidays.  It also allows you to showcase what your family has sent you over the years.


Hope you’re enjoying decorating for this holiday season!

Friday, December 9, 2011

New York, New York

This past weekend the girls and I went to NYC for our second annual Christmas trip.  Last year we decided to go to NY instead of exchanging Christmas gifts.  Living pretty close to the city for the past six years, I've made many trips and find I know my way pretty well.  If I don't, I know the easiest and quickest ways to figure out how to get where I want to go (i.e. hopstop.com).


Since the girls had never seen the tree, last year it was a mandatory stop.  This year we did a lot of what we did last year.  Canal Street and Soho for some Christmas shopping then we had lunch in Little Italy. The food was delizioso; I had ravioli and G, K & K all had gnocchi...mmm I'm hungry just thinking about it again.  We then met up with G's friend from college and headed up to Bryant Park.

Bryant Park is probably most famous for fashion week, but going during the fall/Christmas season is my absolute favorite time to go there.  If you haven't been before, Bryant Park is filled with temporary Christmas Shops, a Christmas tree and ice skating rink.  There is something so pleasant about the whole thing despite the massive crowds.


After that we went to Rockefeller Center to see the tree there and the light show on the Saks Fifth Avenue building.  Here is where the crowd can be so outrageously overwhelming, but if you go in knowing it will be that way (and without small children) it will be easier to stay calm and relaxed.


Finally on our way back to Penn Station we saw the window displays at both Lord and Taylor and Macy's.  Both were really interesting this year an I loved the shapes and lines of all the displays.


The train ride home was tiring because we got stuck next to four kids whose parents did not care that they were being loud and bothersome, but one of us still managed to fall asleep.

Overall a pretty fantastic day in the city, can you tell I was having fun with my camera all day?  Is there anything you do with friends or family every year for/before the holiday season?  Or do you plan on starting any new traditions this year?

Wednesday, December 7, 2011

DIY: Necklace/Earring Tree

While getting ready to move into our new apartment I've been perusing home decor blogs for decorating ideas.  One of these blogs had an idea for a jewelry hanger that I fell in love with:
Creating a jewelry hanger from a cheap picture frame! (Unfortunately I cannot remember what blog I found the idea on.  When I do I will put the site up here)


What you need:


  1. A cheap frame(s) ( I made one for necklaces and one for bracelets)
  2. Thick jewelry wire (especially for heavier jewelry, I found mine at my local Michaels)
  3. Stapler
  4. Scissors
  5. Spray paint (ONLY if you want to make your frames the same color! I have yet to do this to mine)
How to make your jewelry hanger:
  1. Remove glass and back of frame.
  2. Figure out which orientation you'd like for your frame. (I did horizontal for my earrings and vertical for my necklaces.
  3. Measure and cut a piece of wire that is longer than the frame by 2 inches (you can always trim the excess later).
  4. On the back of the frame, use the stapler to secure the wire in place (this may take a few times to get the hang of, especially if the frame is thick).  Bend and staple the wire as you go (it will help the wire hold more weight).  Be careful not to bend the wire too much back and forth because it may break.
  5. Hang using hooks provided on frame.  If they were on the backing you removed then you will need to attach a hook or use the wire you have and create one.


Things about this project:
  • You may find that your necklaces are too long to hand on the wire or that they are hard to unhook without banging the frame against your walls.  I suggest figuring out a way to put hooks instead of wire on the frame you intend to hang the necklaces.  (When I find what I'm looking for I will post pictures here).
  • You can purchase frames that are not the same color and just spray paint them to match (I have yet to do this with mine).
  • You'll see on my earring frame below that I twisted the wire.  I DO NOT recommend this (I will be redoing it ASAP) because the twisting will not stay and starts to get weighed down by the earrings on it.


I love how mine turned out (minus how they look on the blue walls of my room at my parents' house)!!  Even though I still have some more work I would like to do , they are up on the apartment wall currently and make finding that particular pair of earrings easier to find and my necklaces no longer get tangled up!

Do you ever see ideas on other blogs that you instantly want to try?

Monday, December 5, 2011

New Scarf: Lace Hearts


After making the scarf for my mom I went right into making another scarf.  Once again I used yarn remaining from the blanket I made for J’s nephew (Simply Soft Plum Wine).  The pattern I used can be found here.  However, I adjusted this pattern to my own liking.


First, I did not have the size needles that the pattern called for which does not bother me with scarves (I usually do not gauge at all for scarves), so I used size US 6 needles.  Second, the pattern calls for repeating the centers part 3 times, but I only repeated the pattern twice, creating three hearts as opposed to four hearts per row.

Combining these things made my scarf very wide, however, because I was using the remaining yarn from a previous project and the scarf was really wide, it was not nearly as long as I would’ve liked.  In fact, it was too short to be a regular scarf and I did NOT want to go out and buy more yarn. I decided to bind off leaving about a ½ yard of yarn at the end.  Then I decided to experiment with making an infinity scarf so I grabbed a needle, threaded the remaining thread, an attempted to sew the ends together.

Not too shabby!

However, in my opinion, the scarf does not look as nice as an infinity scarf and it is a little tight for an infinity scarf, but is still completely wearable.


What do you think?  Would you wear this scarf?


Friday, December 2, 2011

New Scarf: Lace ZigZag

As you can probably tell from other posts, I like to knit.  For me it is relaxing and a good way to feel productive during football season because I can work on it while we watch the game.

In the past year or so I joined Ravelry.com which is a social network for knitters and crocheters.  Recently I found myself browsing page after page of projects I'd love to try.  Fortunately you can add the patterns you find to a queue or favorites list to come back to.  Since I'm not in the mood to take on another big project right now (i.e. my blanket), I decided to knit a scarf or two then attempt mittens or a hat for myself.

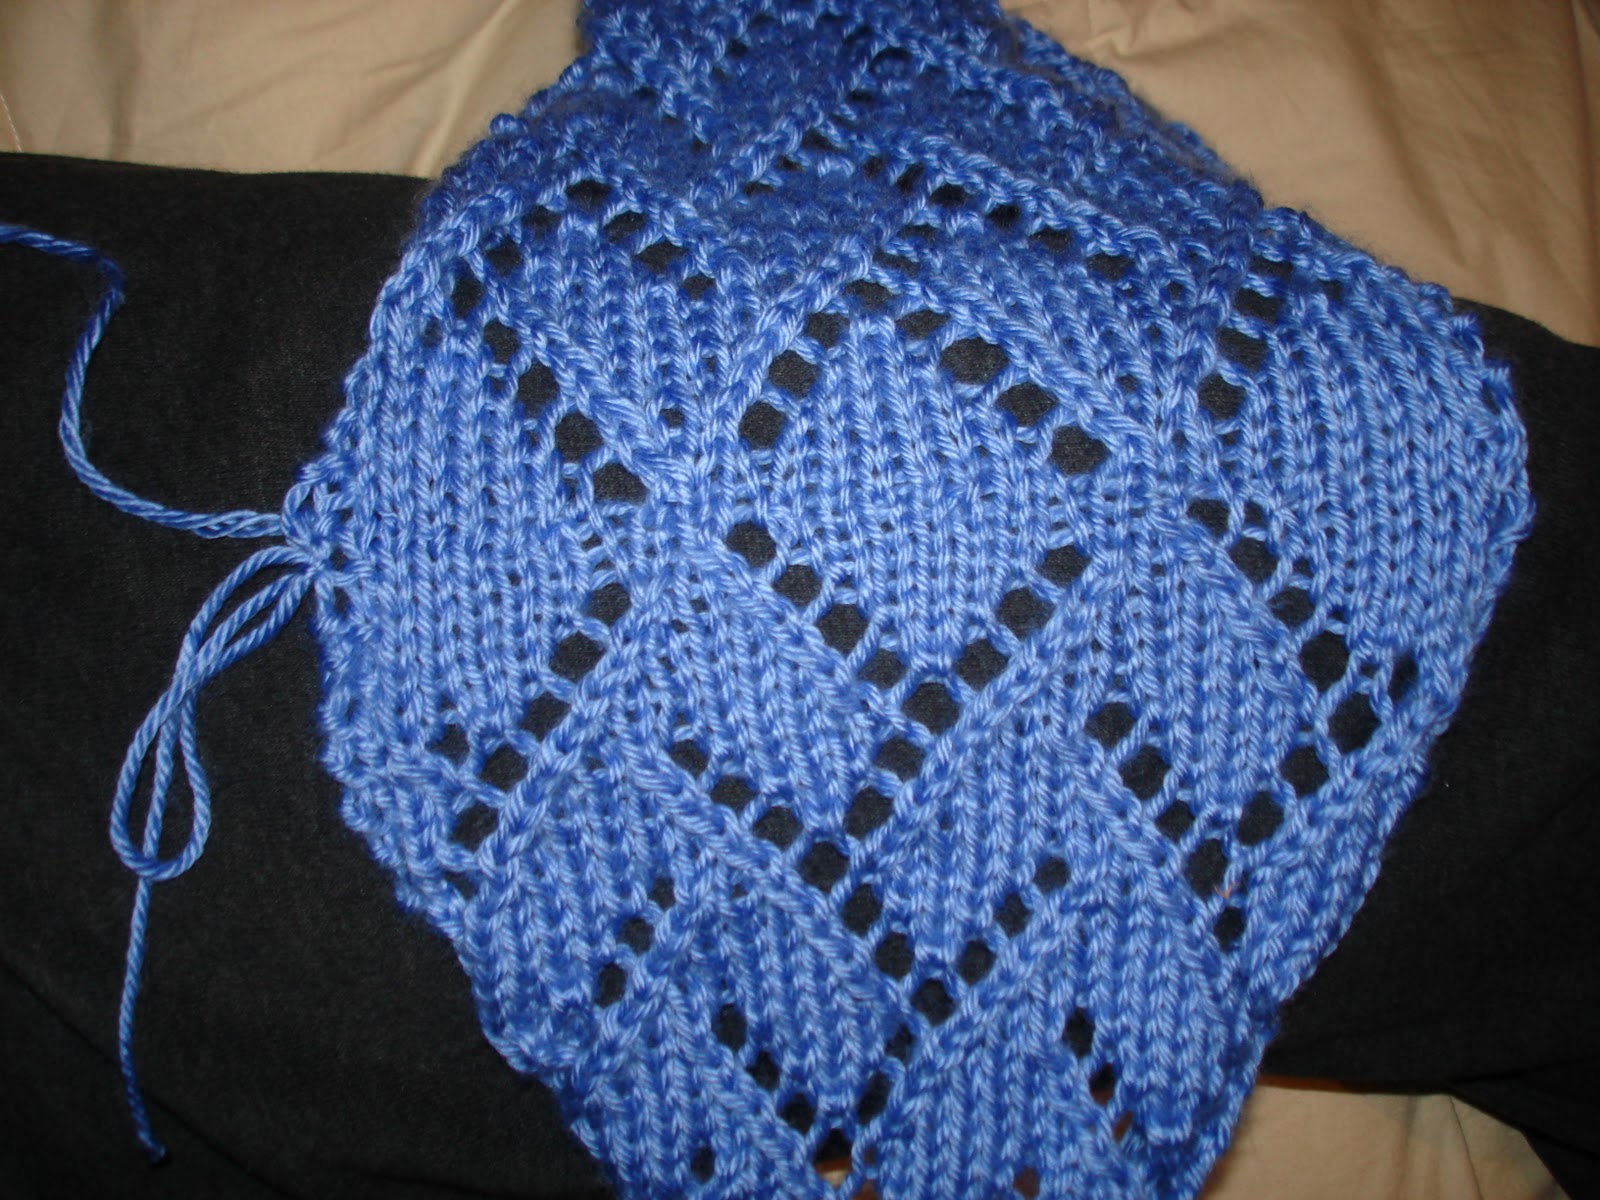
The first scarf I decided to work on used yarn I already had from making J's nephew's blanket. I had a lot of leftover yarn but I decided to use the Simply Soft Berry Blue for this one.  The pattern is Zigzag Lace Scarf by Tamara Stone-Snyder.  My mom liked it so I decided to give it to her when it was complete.  The pattern has stitches I've never done before and calls for sewing two individual pieces together, but after youtubing some videos on how to do them I felt confident in my skills.

What the pattern looks like

Temporarily putting the one half of the scarf on a piece of yarn while I knit the other half.

Now that both halves are done I've place the stitches back on the empty needle.

Using a youtube video I taught myself to graft the two halves together.  You can barely see where the stitches went!

My only issue with this scarf (and most scarves that I make) is that it rolls inward.  I was told blocking would solve this problem, but unfortunately it went right bak to rolling when I unpinned it.  I've also been told that this means I knit too tightly, but I can not seem to get it to stop even when I knit loosely.


I'm a pretty fast knitter and once I start a project I like to work on it during my free time until I'm finished so this scarf took me four days to complete (my break at work and after work for a few hours) plus one additional day to block and wait for it to dry.  I still think it wouldn't take too long for a more novice knitter to complete though.

The pattern can be found at the link earlier in this post and is a free download.  I highly recommend it for someone looking to increase the difficulty of their knitting from beginning to intermediate because once you learn the stitches you'll be able to do so many other 'lace' looking scarves!!