Wednesday, December 7, 2011

DIY: Necklace/Earring Tree

While getting ready to move into our new apartment I've been perusing home decor blogs for decorating ideas.  One of these blogs had an idea for a jewelry hanger that I fell in love with:
Creating a jewelry hanger from a cheap picture frame! (Unfortunately I cannot remember what blog I found the idea on.  When I do I will put the site up here)


What you need:


  1. A cheap frame(s) ( I made one for necklaces and one for bracelets)
  2. Thick jewelry wire (especially for heavier jewelry, I found mine at my local Michaels)
  3. Stapler
  4. Scissors
  5. Spray paint (ONLY if you want to make your frames the same color! I have yet to do this to mine)
How to make your jewelry hanger:
  1. Remove glass and back of frame.
  2. Figure out which orientation you'd like for your frame. (I did horizontal for my earrings and vertical for my necklaces.
  3. Measure and cut a piece of wire that is longer than the frame by 2 inches (you can always trim the excess later).
  4. On the back of the frame, use the stapler to secure the wire in place (this may take a few times to get the hang of, especially if the frame is thick).  Bend and staple the wire as you go (it will help the wire hold more weight).  Be careful not to bend the wire too much back and forth because it may break.
  5. Hang using hooks provided on frame.  If they were on the backing you removed then you will need to attach a hook or use the wire you have and create one.


Things about this project:
  • You may find that your necklaces are too long to hand on the wire or that they are hard to unhook without banging the frame against your walls.  I suggest figuring out a way to put hooks instead of wire on the frame you intend to hang the necklaces.  (When I find what I'm looking for I will post pictures here).
  • You can purchase frames that are not the same color and just spray paint them to match (I have yet to do this with mine).
  • You'll see on my earring frame below that I twisted the wire.  I DO NOT recommend this (I will be redoing it ASAP) because the twisting will not stay and starts to get weighed down by the earrings on it.


I love how mine turned out (minus how they look on the blue walls of my room at my parents' house)!!  Even though I still have some more work I would like to do , they are up on the apartment wall currently and make finding that particular pair of earrings easier to find and my necklaces no longer get tangled up!

Do you ever see ideas on other blogs that you instantly want to try?

Monday, December 5, 2011

New Scarf: Lace Hearts


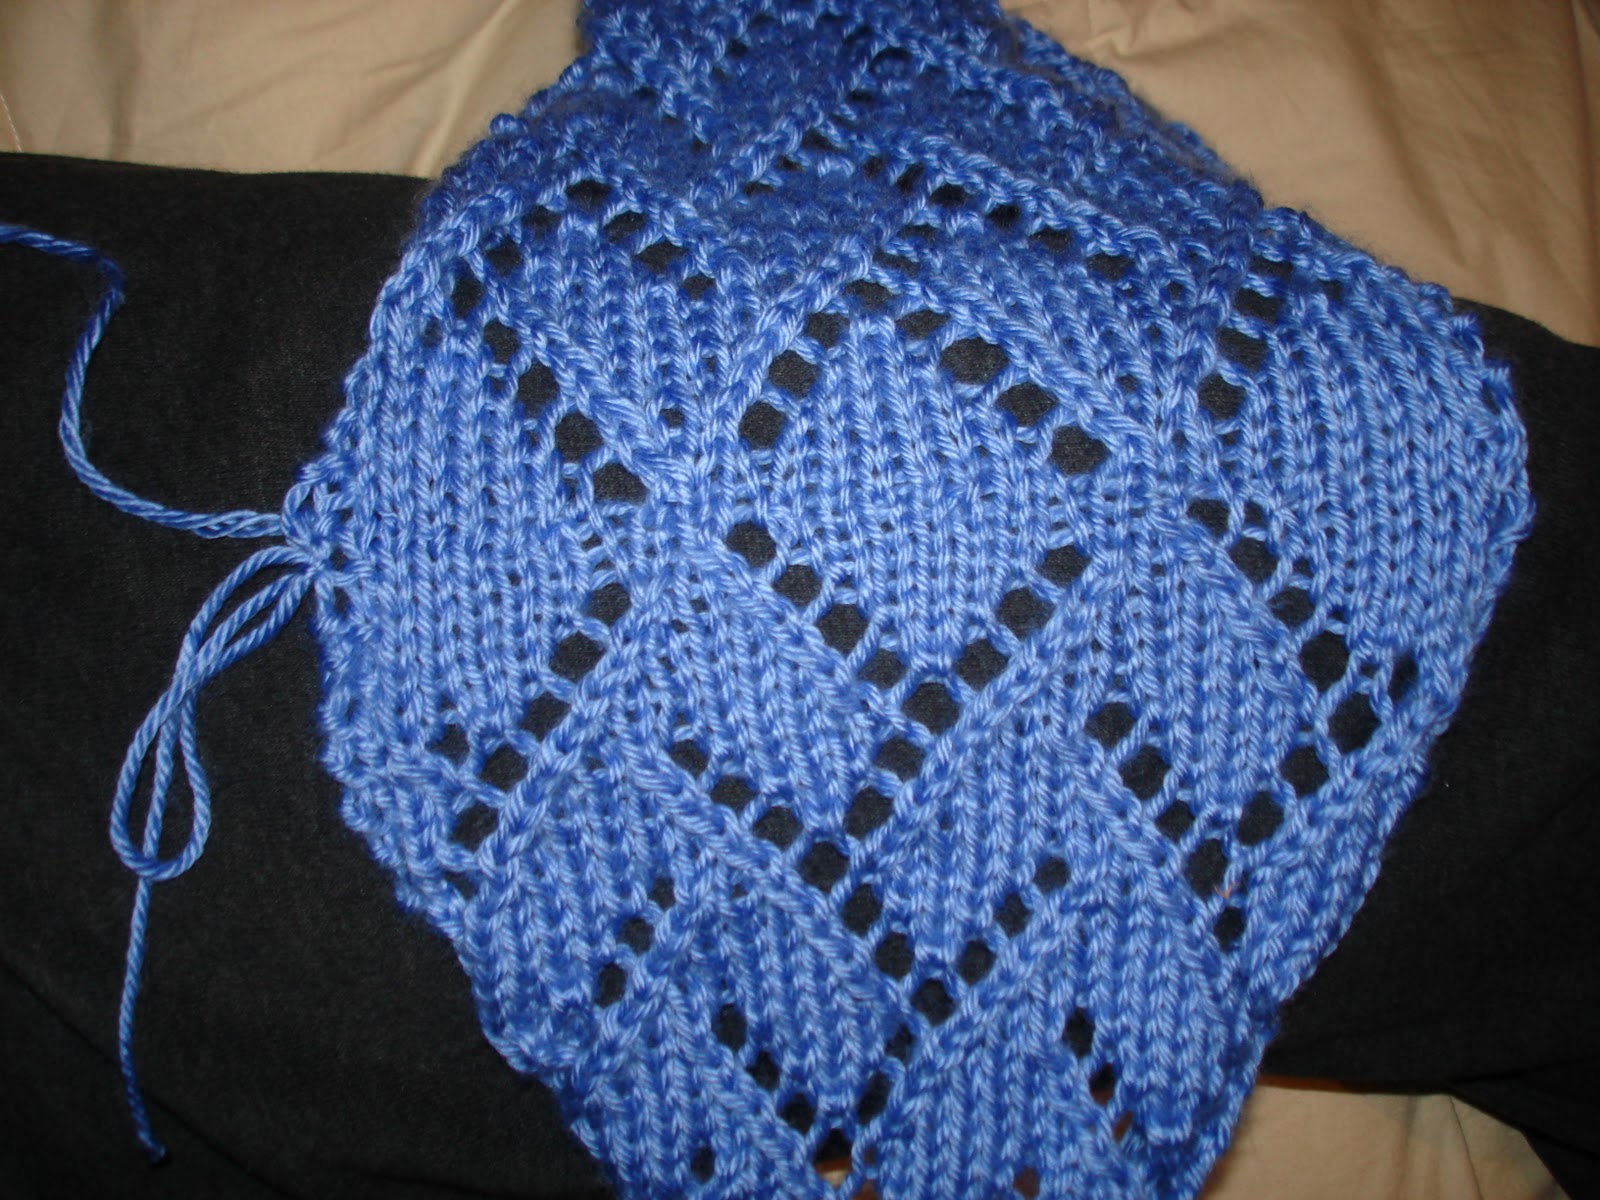
After making the scarf for my mom I went right into making another scarf.  Once again I used yarn remaining from the blanket I made for J’s nephew (Simply Soft Plum Wine).  The pattern I used can be found here.  However, I adjusted this pattern to my own liking.


First, I did not have the size needles that the pattern called for which does not bother me with scarves (I usually do not gauge at all for scarves), so I used size US 6 needles.  Second, the pattern calls for repeating the centers part 3 times, but I only repeated the pattern twice, creating three hearts as opposed to four hearts per row.

Combining these things made my scarf very wide, however, because I was using the remaining yarn from a previous project and the scarf was really wide, it was not nearly as long as I would’ve liked.  In fact, it was too short to be a regular scarf and I did NOT want to go out and buy more yarn. I decided to bind off leaving about a ½ yard of yarn at the end.  Then I decided to experiment with making an infinity scarf so I grabbed a needle, threaded the remaining thread, an attempted to sew the ends together.

Not too shabby!

However, in my opinion, the scarf does not look as nice as an infinity scarf and it is a little tight for an infinity scarf, but is still completely wearable.


What do you think?  Would you wear this scarf?


Friday, December 2, 2011

New Scarf: Lace ZigZag

As you can probably tell from other posts, I like to knit.  For me it is relaxing and a good way to feel productive during football season because I can work on it while we watch the game.

In the past year or so I joined Ravelry.com which is a social network for knitters and crocheters.  Recently I found myself browsing page after page of projects I'd love to try.  Fortunately you can add the patterns you find to a queue or favorites list to come back to.  Since I'm not in the mood to take on another big project right now (i.e. my blanket), I decided to knit a scarf or two then attempt mittens or a hat for myself.

The first scarf I decided to work on used yarn I already had from making J's nephew's blanket. I had a lot of leftover yarn but I decided to use the Simply Soft Berry Blue for this one.  The pattern is Zigzag Lace Scarf by Tamara Stone-Snyder.  My mom liked it so I decided to give it to her when it was complete.  The pattern has stitches I've never done before and calls for sewing two individual pieces together, but after youtubing some videos on how to do them I felt confident in my skills.

What the pattern looks like

Temporarily putting the one half of the scarf on a piece of yarn while I knit the other half.

Now that both halves are done I've place the stitches back on the empty needle.

Using a youtube video I taught myself to graft the two halves together.  You can barely see where the stitches went!

My only issue with this scarf (and most scarves that I make) is that it rolls inward.  I was told blocking would solve this problem, but unfortunately it went right bak to rolling when I unpinned it.  I've also been told that this means I knit too tightly, but I can not seem to get it to stop even when I knit loosely.


I'm a pretty fast knitter and once I start a project I like to work on it during my free time until I'm finished so this scarf took me four days to complete (my break at work and after work for a few hours) plus one additional day to block and wait for it to dry.  I still think it wouldn't take too long for a more novice knitter to complete though.

The pattern can be found at the link earlier in this post and is a free download.  I highly recommend it for someone looking to increase the difficulty of their knitting from beginning to intermediate because once you learn the stitches you'll be able to do so many other 'lace' looking scarves!!

Wednesday, November 30, 2011

Thanksmas & Pumpkin Cheesecake

I apologize for the mini-hiatus, with moving into the new apartment and Thanksgiving, J and I have been really busy packing, unpacking, and baking.  Hopefully it won't be to long before I can share before & after pictures of the apartment.  In the meantime I have some small crafts and recipes to share with you!

Today I'm sharing with you my absolute favorite recipe for pumpkin cheesecake!  For the past couple of years I've made sure to bring this to our family Thanksmas festivities.  What's Thanksmas you ask?  Well, at Thanksgiving we get together with my mom's side of the family and we usually celebrate Thanksgiving the day after (aka Black Friday) so everyone has time to et together and we can miss the bad traffic by travelling on Thanksgiving.  Since we do not get together for Christmas we do a secret santa at our Thanksgiving.  One year someone called our get together Thanksmas because it is a combination of the two holidays and it has stuck ever since.  Thanksmas is my favorite holiday because I get to be with my family and I personally think it has the best food of any holiday.

One year I experimented with this cheesecake even though I'm not a huge fan of cheesecake.  Now, every year I make this for our Thanksmas and other holiday parties because everyone asks for it.  It is the only Paula Deen recipe I use consistently.  It is creamy, the crust is just the right thickness, and the recipe is pretty simple.

I follow the recipe here with a slight tweak.  I make sure to put my cheesecake in a water bath to prevent cracking.  If you have not done this before:

  1. Cover the outside of your springform pan with tinfoil before or after you make the crust, but BEFORE you pour in the filling.
  2. Find a pan that can fit your springform pan in it comfortably.
  3. Boil water, you will need to fill the pan with water up to the top of the cheesecake in the springform pan (But not the top of the springform pan!). **Make sure to place the springform pan into the pan and into the oven BEFORE pouring the water (otherwise it will be hard to move into the fridge).
  4. Cook at the same temperature and length of time that the recipe calls for.

Unfortunately I didn't take any pictures of this prior to our festivities, but this shows you how much we ate!


I highly suggest this recipe if you are a fan of pumpkin flavored desserts!!

Monday, November 14, 2011

Big Project Finally Complete

For the past couple of posts I've been telling you that I'm almost finished with a project that I've been working on for a while.  I'm happy to say that it is finally COMPLETE and I can share it with you.

A hand-knitted blanket!


I've been working on this blanket since January, but the second it got warm outside I stopped working on it.  When it starts to get chilly here in Jersey I almost immediately get in the mood to knit.  Yes, I realize that some people consider this to be an old lady hobby, but to be honest I could care less.  I find it relaxing and I feel accomplished when I finish a project.

This is not my first blanket (see below for others I have made), but it is the first blanket I've made for myself. 


This is the most tedious blanket I've ever done, even the most detailed knitting project I've done in general.  The pattern that I followed (for the most part) can be found at Free Knitting Pattern: Fireside Patchwork Afghan, but you may need to create an account before you can view the pattern.  

Since this is a blanket that I made for myself, I did not follow the pattern exactly, instead I adjusted things for my own liking.  

Things I did different from the pattern you'll find at the above link:
  • I did not use Lion Brand Yarn or shades of brown.  Instead I went with Loops & Threads Impeccable Yarn (found at Michaels) and the colors Heather, Lavender, Amethyst, Chocolate and I believe the other purple was called grape (which can be found here except for the grape color).
  • I did not check my gauge, nor did I block my squares.  This unfortunately was a problem when  I went to sew the squares together and had to fold some squares back to make them the appropriate size.
  • I added a whole row and column to the original pattern (Only 4 x 5), which means I had to make more squares (10 more).  I created a new arrangement of squares that accounted for the extra row and column (this way there weren't two of the same square in one row or column if I could help it).  This made my blanket big, but cosy enough to use on the couch (roughly 47" by 70"). 
  • I crocheted a border around each square and then crocheted the squares together instead of just hand sewing all of the blocks together.
  • I also crocheted the border around the whole blanket instead of knitting.  Knitting it seemed time consuming and more confusing using the pattern instructions.
  • The back of my blanket looked AWFUL.  I'm not very good at carrying yarn along so that it stays really close to the finished product (so there are a lot of gaps you can get fingers and toes stuck in).  I was going to back the entire thing in fleece, but after talking to my mom about it I decided to use flannel instead.  I went with a simple brown flannel because I want you to be looking at the part I knitted, not the flannel.
Backing the blanket with flannel was not as easy as I would've liked (because the yarn stretched and the flannel did not), but I'm happy with the outcome.  I did not sew the flannel to the edges of the blanket, rather the edge of the knitted squares.  This was part personal preference and part that I could not find flannel in a color I liked that was wide enough.  Also, as advised by my mom I sewed the corners of the squares to the flannel so it would not shift around.  I made little x's like the picture above so that they didn't look messy on the front or back of the blanket.


While I'm very happy with the overall product, I do have recommendations to those of you who decide to try this pattern:
  • Test your gauge for each individual square for a more concise size for each square (my block #6 was WAY too big and my block #4 was too skinny)
  • Block your squares.  I really think this would've paid off for me.
  • Sew your flannel to the actual corners of the blanket (not the corners of the knitted part).  I believe that this is one of the reasons that my blanket seems to bubble instead of sit flat.
  • Take your Time.  This project is time consuming, so if you start it try not to get frustrated with how long it takes or try to hurry through it because you may mess up some of the squares.  even though you may not be able to see it in some of these pictures, I have a lot of mistakes that I attribute to trying to speed through this project.


If you do decide to make this blanket or even scarves using the patterns from the blanket send them to me!   I'd love to see your creations!

Wednesday, November 9, 2011

Christmas Yarn Wreath

I don't know how many of you are like this, but wandering the interwebs can be such a bad things for a girl like me.  I love crafting and when I come across something I like, that I think I could do, it gets bookmarked until a day when I have the time and resources to complete whatever it is.

This is exactly what happened when I came across this, thisthis, and this.  Since J and I are moving soon I want to have things to decorate our apartment with.  My favorite of these wreathes is the fourth link, the fall colored wreath.  However, by the time we move into our apartment, Fall will almost be over and we already have a cute Fall door decoration.  Thus I decided to go for a Christmas themed wreath.

I apologize for not taking pictures of my supplies before beginning, but I was so excited to start it!
Here are the supplies you need for this project:

  • A foam wreath (mine was 12")
  • Yarn (Whatever colors you choose)
  • Any cute embellishments
  • A hot glue gun or some other form of glue to make sure your knots do not come undone
These were my materials minus the foam wreath.

This project is not hard, but it is time consuming.

I highly suggest you mark off on your wreath where you want each color of yarn to go (this is especially good to do if you have a particular pattern in mind or want it to be even).  Then start with your first color and tie it to the wreath (you could use hot glue here too, but I chose not to use it until I was entirely done).  Tie off each color the same way you tied it on, make sure you are tying and winding the yarn TIGHTLY, otherwise it will unwind!
Almost done here, just to show you the front and back.

When I finished I tied all of the ends as tight as possible and then trimmed the ends.  Then I went over all of the knots with hot glue and the ends as well so I could hide them (this way you can't see them from the front).


Let all of your hot glue dry before moving onto the next step unless you want to be like me and burn your fingers.  Next you'll want to pick where you want to hang your wreath from and decide where is the best spot to place your embellishments.  If you purchase embellishments like the ones I did, use the foam to your advantage and place it right through (I had to move mine around several times before picking the perfect spot).
Bend the ends back (and if you can, back into the foam), and hot glue the ends (this is to keep it in place and so it won't scratch your walls/door).  I also used hot glue on the front where I put my embellishments in as well for extra support (so they hopefully won't droop over time).  Let the hot glue dry.

Then you can hang your wreath however you like.  I made a makeshift hook using yarn I had by cutting a piece of yarn, knotting it and looping it around the wreath.

Here it is hung on the wall (although just temporarily because we won't decorate for Christmas until after Thanksgiving!).  I apologize the picture isn't the greatest.

If you make your own yarn wreath send a picture or post it in the comments! I'd love to see how do this project and what ideas you come up with!!


Tuesday, November 8, 2011

Dulche De Leche Cupcakes

It has been a very busy past few weeks so I apologize for the lack of posts.  Soon I'll be sharing with you two of my favorite projects so far!  Both are in their final stages and I can't wait for them to be done.

Here is a small list of what has been going on recently:

  • Went to my cousin's wedding with my Gma. What a fantastic celebration!
  • Wrapping up the marking period at school. (I get a whole new group in one of my classes come Monday!)
  • Celebrated my 25th birthday last Friday
  • Watching some pretty awful and great college football games, including an incredible Rutgers win Saturday
  • Worked on some fun projects, J says I'm becoming an old lady, but I disagree
  • J and I are moving into our new place next Friday!
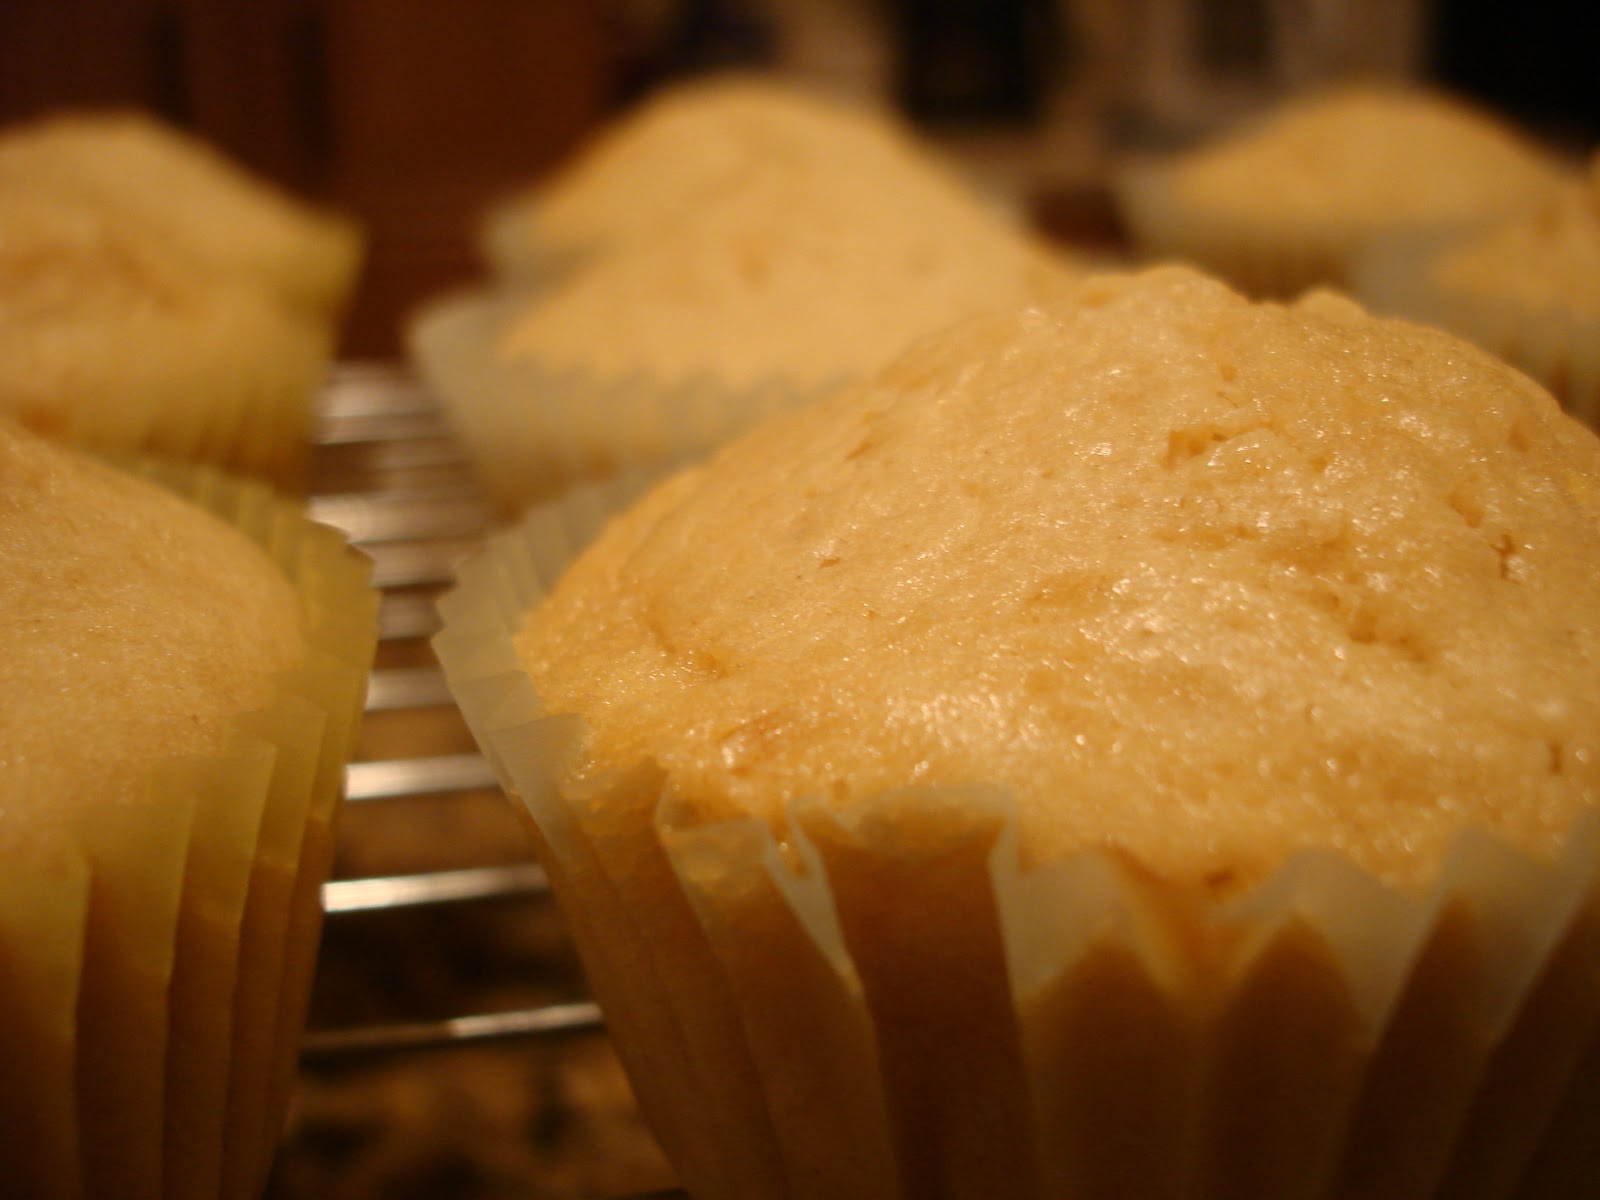
Since I don't have my projects to share with you, here is a recipe review for you.  I made cupcakes for G's birthday a little while back.  I came across this recipe at The Way the Cooke Crumbles.  I followed the recipe exactly so please check out the link above for the recipe.

I made the cupcakes the night before and the icing the day of so I can't tell you how well the icing help up over night.  What I can tell you was that I was disappointed in the cupcakes themselves, they were more bitter and dry than I was expecting.  On the other hand, the icing was DELICIOUS!  Airy and not too sweet, the perfect frosting for me (because I'm not a huge fan of super sweet, thick icing).  The icing belongs with a cupcake that is sweeter than this cupcake, but not ridiculously sweet.  The cupcake was good in theory but had a bitter after taste that was not pleasant.


The girls enjoyed the cupcakes and were impressed that I made all of it from scratch instead of a box.  I wish I understood baking a little bit better so I could giure out how to make these cupcakes the way I'd like them to be.  Overall, I highly recommend this frosting recipe, but the cupcake recipe you can skip if you have a better recipe for a caramel/dulche de leche cupcake.

I have a four day weekend from work his week because of the Teacher's Convention in AC so hopefully I will finish my projects and post them for you!

Happy Cupcake-making!