As I’ve said before, J and I decided it would be a pain to
paint our apartment walls only to have to possibly paint them back to a boring
white color when we move. I was
browsing through pinterest.com pages when I found this awesome, easy way to add
a pop of color to the room.
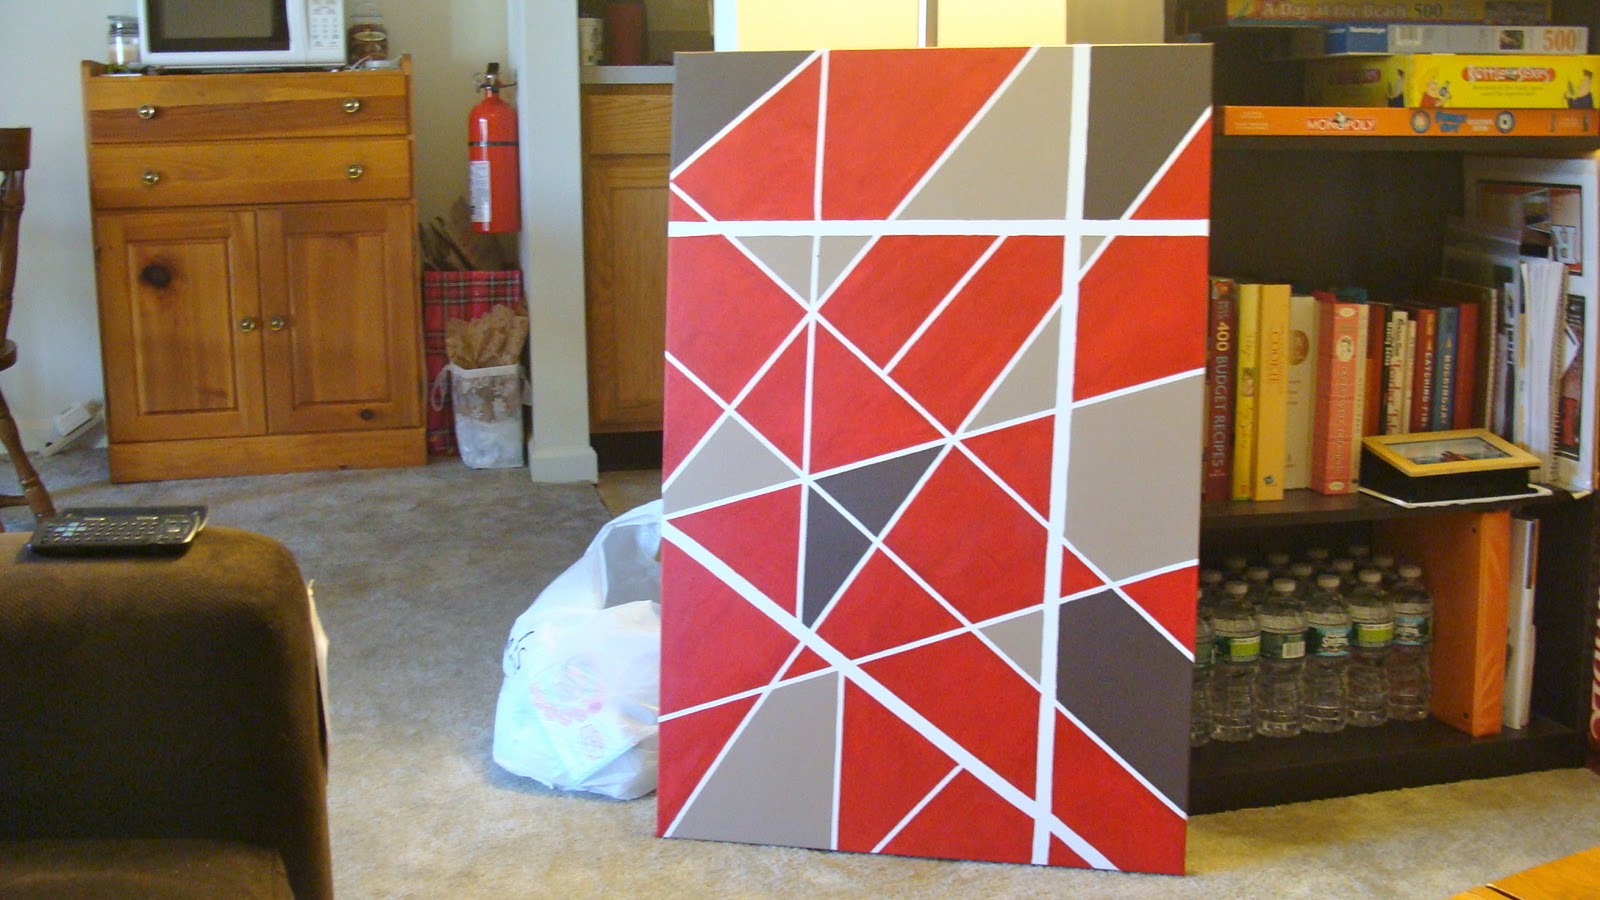
This weekend I bought all of the supplies:
·
a 24x36 canvas (for only $10 with the store’s
sale and a 20% off coupon!)
·
a 16x20 canvas (couldn’t pass up a good deal!)
·
paint (for the larger canvas: for the smaller
canvas:)
·
three small sponge brushes and one large sponge
brush
·
I couldn’t find ¼” painters tape so I bought ¼”
quilter’s tape and ¾” electrical tape.

I promise this project is minimally messy and pretty
quick. If you want to follow
thenewdomestic.com’s method then you will first need to create a mock version
of your painting. Instead of doing
this I just haphazardly put tape down on my canvas. (*Note: If you decide to use electrical tape make sure to
really press it down into the canvas as it will peel up a little if you don’t
and you will not end up with totally clean lines.)

I also chose not to pre-decide where I wanted each color to
go. I just knew that with the
larger canvas I wanted red to be the main color and on the smaller canvas dark
blue would be more present. I used
a Tupperware containers and a lid as a palette and worked on the smaller canvas
first.


Like I said before I did not plan out which sections would
be what color. As I went I would
just think that an area looked like it was too much dark blue and needed a
splash of light blue. I did the
same with my larger canvas, but I also knew that the color I wanted the least
of was the dark brown because I didn’t want the painting to make the room look
dark. I painted 2-3 coats of
each color because some needed the extra layer to look the way I wanted it to
be.


My paint directed that I wait 1 hour between layers of
paint, but to be honest it was pretty dry after 10 minutes so I just went on to
the next layers when it was dry to touch.
I waited about 5-10 minutes after the last layer before peeling off the
strips of tape. Make sure to pull
the tape in order (some of mine overlapped) otherwise you could ruin some of
your straight lines if your paint is not totally dry!


I let both canvases dry overnight before attempting to hang
them (just so I wouldn’t accidentally get paint on the wall. The paint brand that I purchased says
it takes 21 days for the paint to cure so J and I decided that we would wait to
hang up the canvas in the bathroom until then because the moisture from
showering might cause it not to cure completely or make the paint run. (That doesn’t mean I can’t take a
picture to show you what it would look like!) We did decide, however, that the large canvas could go up in
the living/dining room without waiting for the paint to cure.

The nice things about the canvases that I purchased is that
they are light and instead of hammering nails into the apartment walls, we just
used thumbtacks to hold them up instead of possibly hammering nails into wiring
in the walls.


Doesn't it add such a great punch of color to both rooms!? What home decor have you created for a fraction of what it would've cost to purchase that item in a store?
I followed your link form newdomestic, and this is awesome! you've inspired me =]
ReplyDeleteThanks it was fun and easy! Its such an easy way to add something fancy looking to a bland space. In my first apartment out of college it was a way to make the space mine
Delete